 使用kubeadm引导k8s集群
# 1. 机器配置
系统版本:
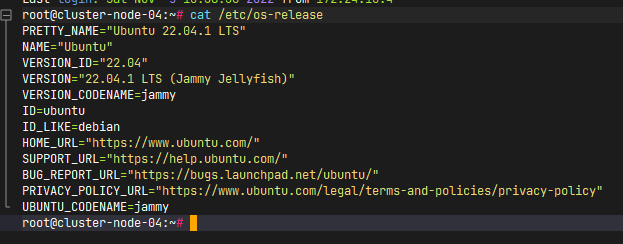
# 1.1 设置hosts (所有机器)
本次集群规模为3master 和4node , 外加一个harbor 存储镜像 信息如下:
root@cluster:~# vim /etc/hosts

172.24.10.105				cluster-master-01
172.24.10.106				cluster-master-02
172.24.10.107				cluster-master-03
172.24.10.108				cluster-node-01
172.24.10.109				cluster-node-02
172.24.10.110				cluster-node-03
172.24.10.111				cluster-node-04
172.24.10.102				harbor.xiaobai1202.com
1
2
3
4
5
6
7
8
9
10
11
2
3
4
5
6
7
8
9
10
11
# 1.2 关闭swap、selinux、firewall (所有机器)
swap
# 临时关闭
root@cluster:~# swapoff -a
# 永久关闭  注释掉swap的挂载(建议永久关闭)
root@cluster:~# vi /etc/fstab
1
2
3
4
2
3
4
selinux
# 若存在配置文件
root@cluster:~# sed -i 's/SELINUX=enforcing/SELINUX=disabled/g' /etc/selinux/config

#若不存在 则直接新建一个:
root@cluster:~# echo 'SELINUX=disabled' >> /etc/selinux/config
1
2
3
4
5
2
3
4
5
防火墙
root@cluster:~# ufw disable
root@cluster:~# service ufw stop
root@cluster:~# systemctl disable ufw
1
2
3
2
3
# 1.3 同步系统时间 (所有机器)
首先,先修正系统时区 UTC+8
# 首先查看支持的时区
root@cluster:~# timedatectl list-timezones
# 下面这句有输出的话就是支持北京时间的
root@cluster:~# timedatectl list-timezones | grep 'Asia/Shanghai'
# 设置时区为北京时间
root@cluster:~# timedatectl set-timezone Asia/Shanghai
# 查看时区
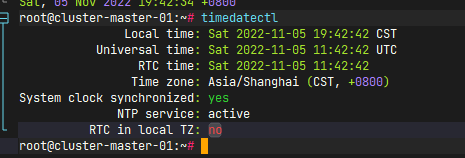
root@cluster:~# timedatectl
1
2
3
4
5
6
7
8
2
3
4
5
6
7
8
输出如下为正常:
然后使用时间服务器进行同步
# 关闭默认同步
root@cluster:~# timedatectl set-ntp false
# 安装ntpdate
root@cluster:~# apt install ntpdate
# 同步时间
root@cluster:~# /usr/sbin/ntpdate ntp.aliyun.co
# 配置每天定时同步
root@cluster:~# crontab -e
# 添加如下行 (去掉注释)
## 05 00 * * * /usr/sbin/ntpdate ntp.aliyun.com
1
2
3
4
5
6
7
8
9
10
2
3
4
5
6
7
8
9
10
# 1.4 开启转发 (所有机器)
# 第一步 启用内核模块
root@cluster:~# modprobe overlay
root@cluster:~# modprobe br_netfilter
root@cluster:~# lsmod | grep br_netfilter

# 第二步  写入配置
root@cluster:~# cat > /etc/sysctl.d/k8s.conf <<EOF
net.bridge.bridge-nf-call-ip6tables = 1
net.bridge.bridge-nf-call-iptables = 1
net.ipv4.ip_forward = 1
EOF

# 第三步  刷新配置
root@cluster:~# sysctl -p /etc/sysctl.d/k8s.conf
1
2
3
4
5
6
7
8
9
10
11
12
13
14
2
3
4
5
6
7
8
9
10
11
12
13
14
# 2 安装容器运行时 containerd (所有机器)
# 2.1 安装参考
https://github.com/containerd/containerd/blob/main/docs/getting-started.md (opens new window)
安装containerd/ runc/ cni plugins
# 下载containerd 二进制
root@cluster:~# wget  https://github.com/containerd/containerd/releases/download/v1.6.9/containerd-1.6.9-linux-amd64.tar.gz

# 解压到指定位置
root@cluster:~# tar Cxzvf /usr/local containerd-1.6.2-linux-amd64.tar.gz

# 生成服务配置文件
root@cluster:~# cat > /usr/lib/systemd/system/containerd.service <<EOF
# Copyright The containerd Authors.
#
# Licensed under the Apache License, Version 2.0 (the "License");
# you may not use this file except in compliance with the License.
# You may obtain a copy of the License at
#
#     http://www.apache.org/licenses/LICENSE-2.0
#
# Unless required by applicable law or agreed to in writing, software
# distributed under the License is distributed on an "AS IS" BASIS,
# WITHOUT WARRANTIES OR CONDITIONS OF ANY KIND, either express or implied.
# See the License for the specific language governing permissions and
# limitations under the License.

[Unit]
Description=containerd container runtime
Documentation=https://containerd.io
After=network.target local-fs.target

[Service]
#uncomment to enable the experimental sbservice (sandboxed) version of containerd/cri integration
#Environment="ENABLE_CRI_SANDBOXES=sandboxed"
ExecStartPre=-/sbin/modprobe overlay
ExecStart=/usr/local/bin/containerd

Type=notify
Delegate=yes
KillMode=process
Restart=always
RestartSec=5
# Having non-zero Limit*s causes performance problems due to accounting overhead
# in the kernel. We recommend using cgroups to do container-local accounting.
LimitNPROC=infinity
LimitCORE=infinity
LimitNOFILE=infinity
# Comment TasksMax if your systemd version does not supports it.
# Only systemd 226 and above support this version.
TasksMax=infinity
OOMScoreAdjust=-999
EOF

# 重新加载并启用containerd服务
root@cluster:~# systemctl daemon-reload
root@cluster:~# systemctl enable --now containerd
root@cluster:~# service containerd status

# 安装runc插件
root@cluster:~# wget https://github.com/opencontainers/runc/releases/download/v1.1.4/runc.amd64
root@cluster:~# install -m 755 runc.amd64 /usr/local/sbin/runc

# 创建文件夹并安装cni插件
root@cluster:~# mkdir -p /opt/cni/bin
root@cluster:~# wget https://github.com/containernetworking/plugins/releases/download/v1.1.1/cni-plugins-linux-amd64-v1.1.1.tgz
root@cluster:~# tar Cxzvf /opt/cni/bin cni-plugins-linux-amd64-v1.1.1.tgz
1
2
3
4
5
6
7
8
9
10
11
12
13
14
15
16
17
18
19
20
21
22
23
24
25
26
27
28
29
30
31
32
33
34
35
36
37
38
39
40
41
42
43
44
45
46
47
48
49
50
51
52
53
54
55
56
57
58
59
60
61
62
63
2
3
4
5
6
7
8
9
10
11
12
13
14
15
16
17
18
19
20
21
22
23
24
25
26
27
28
29
30
31
32
33
34
35
36
37
38
39
40
41
42
43
44
45
46
47
48
49
50
51
52
53
54
55
56
57
58
59
60
61
62
63
# 2.2 配置containerd 使用 systems cgroup (所有机器)
首先 生成默认配置:
root@cluster:~# sudo mkdir -p /etc/containerd/
root@cluster:~# containerd config default | sudo tee /etc/containerd/config.toml
1
2
2
然后替换其中的cgroup驱动为systemd
root@cluster:~# sed -i 's/SystemdCgroup \= false/SystemdCgroup \= true/g' /etc/containerd/config.toml
### 重点  这个一定要改
sandbox_image = "registry.cn-hangzhou.aliyuncs.com/google_containers/pause:3.6"

# 修改完配置 重启containerd服务
root@cluster:~# systemctl restart containerd.service
root@cluster:~# systemctl enable containerd.service
1
2
3
4
5
6
7
2
3
4
5
6
7
# 3 引导集群
# 3.1 一些必要的工具(kubeadm、kubelet、kubectl、crictl) (所有机器)
安装crictl
root@cluster:~# wget https://github.com/kubernetes-sigs/cri-tools/releases/download/v1.25.0/crictl-v1.25.0-linux-amd64.tar.gz

root@cluster:~# tar Cxzvf /usr/local/bin crictl-v1.25.0-linux-amd64.tar.gz

## 创建配置文件(/etc/crictl.yaml)

runtime-endpoint: unix:///run/containerd/containerd.sock
image-endpoint: unix:///run/containerd/containerd.sock
timeout: 10
debug: false
pull-image-on-create: false
disable-pull-on-run: false
1
2
3
4
5
6
7
8
9
10
11
12
13
2
3
4
5
6
7
8
9
10
11
12
13
安装引导集群所需要的k8s组件工具
# 添加k8s源
root@cluster:~# apt install install -y apt-transport-https ca-certificates curl

root@cluster:~# curl -fsSLo /usr/share/keyrings/kubernetes-archive-keyring.gpg  https://mirrors.aliyun.com/kubernetes/apt/doc/apt-key.gpg

root@cluster:~# echo "deb [signed-by=/usr/share/keyrings/kubernetes-archive-keyring.gpg] http://mirrors.aliyun.com/kubernetes/apt kubernetes-xenial main" | sudo tee /etc/apt/sources.list.d/kubernetes.list

root@cluster:~# apt update

# 安装组件

root@cluster:~# apt install kubeadm=1.25.3-00
root@cluster:~# apt install kubectl=1.25.3-00
root@cluster:~# apt install kubelet=1.25.3-00

# 冻结版本
root@cluster:~# apt-mark hold kubelet kubeadm kubectl
1
2
3
4
5
6
7
8
9
10
11
12
13
14
15
16
17
2
3
4
5
6
7
8
9
10
11
12
13
14
15
16
17
# 3.2 为master 安装keepalived并配置 实现高可用 (所有master节点)
root@cluster:~# apt install keepalived libul*
1
在每个master节点的 /etc/keepalived 下面新建 k8s.conf (内容相同但是 vrrp_instance.priority不同)
global_defs {
   router_id LVS_DEVEL
}
vrrp_instance VI_1 {
    state BACKUP
    nopreempt
    interface ens32
    virtual_router_id 80
    priority 100
    advert_int 1
    authentication {
        auth_type PASS
        auth_pass just0kk
    }
    virtual_ipaddress {
      # 虚拟接口地址
        172.24.10.201/24
    }
}
virtual_server 172.24.10.201 6443 {
    delay_loop 6
    lb_algo loadbalance
    lb_kind DR
    net_mask 255.255.255.0
    persistence_timeout 0
    protocol TCP
    real_server 172.24.10.105 6443 {
        weight 1
        SSL_GET {
            url {
              path /healthz
              status_code 200
            }
            connect_timeout 3
            nb_get_retry 3
            delay_before_retry 3
        }
    }
    real_server 172.24.10.106 6443 {
        weight 1
        SSL_GET {
            url {
              path /healthz
              status_code 200
            }
            connect_timeout 3
            nb_get_retry 3
            delay_before_retry 3
        }
    }
    real_server 172.24.10.107 6443 {
        weight 1
        SSL_GET {
            url {
              path /healthz
              status_code 200
            }
            connect_timeout 3
            nb_get_retry 3
            delay_before_retry 3
        }
    }
}
1
2
3
4
5
6
7
8
9
10
11
12
13
14
15
16
17
18
19
20
21
22
23
24
25
26
27
28
29
30
31
32
33
34
35
36
37
38
39
40
41
42
43
44
45
46
47
48
49
50
51
52
53
54
55
56
57
58
59
60
61
62
63
2
3
4
5
6
7
8
9
10
11
12
13
14
15
16
17
18
19
20
21
22
23
24
25
26
27
28
29
30
31
32
33
34
35
36
37
38
39
40
41
42
43
44
45
46
47
48
49
50
51
52
53
54
55
56
57
58
59
60
61
62
63
配置文件编辑好以后就可以启动了
root@cluster:~# systemctl enable keepalived && systemctl start keepalived && systemctl status keepalived
1
# 3.3 准备正式引导集群(master节点)
在一个master 节点执行,注意control-plane-endpoint就是我们高可用的虚拟地址
root@cluster:~# kubeadm init \
--apiserver-advertise-address 0.0.0.0 \
--apiserver-bind-port 6443 \
--control-plane-endpoint 172.24.10.201 \
--image-repository registry.cn-hangzhou.aliyuncs.com/google_containers \
--kubernetes-version v1.25.3 \
--pod-network-cidr 172.16.0.0/16 \
--service-cidr 10.221.0.0/16 \
--service-dns-domain k8s.xiaobai1202.com \
--upload-certs
1
2
3
4
5
6
7
8
9
10
2
3
4
5
6
7
8
9
10
执行完毕后 结果如下:
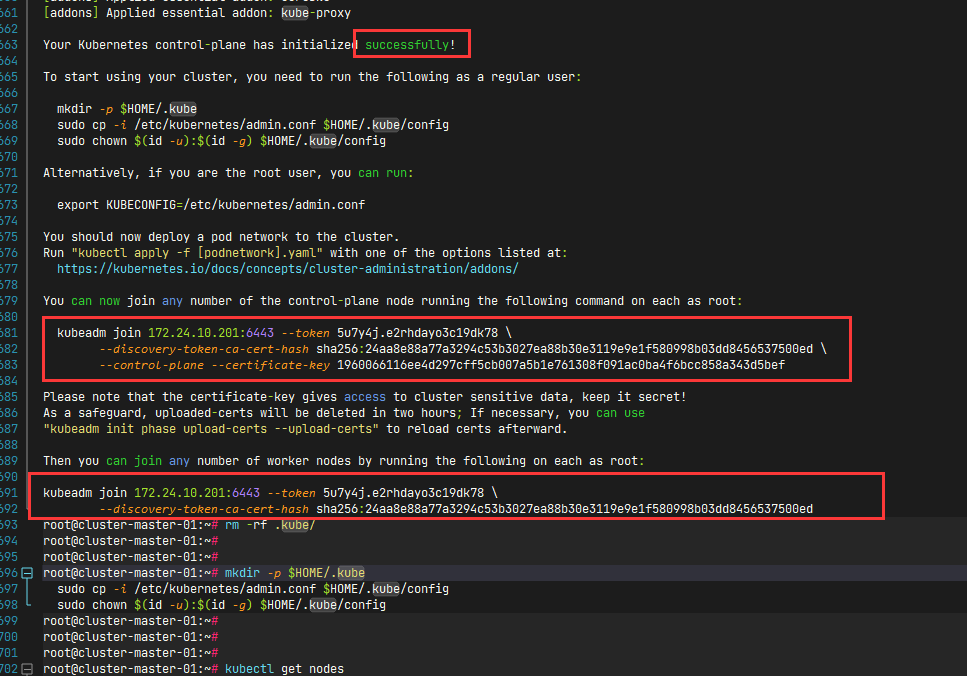
红框中的命令,若要加入更多的master 使用第一个命令 若要加入node 使用第二个命令
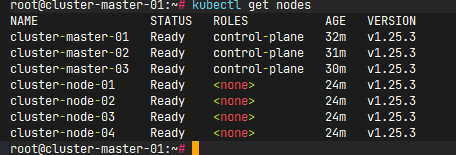
最后检查集群状态:
# 任意一个master 执行
root@cluster:~# kubectl get nodes
1
2
2
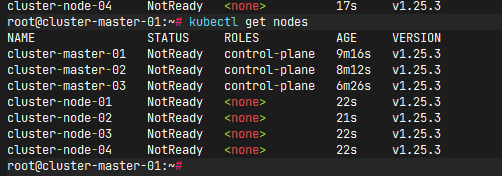
not ready 是因为集群的网络插件没有安装 下一步 安装网络插件
# 4 安装网络插件
使用calico (需要修改自己pod的cidr和service的cidr,参考初始化集群时指定的cidr)
然后查看节点状态:
done!